Impulsify
Kiosk
Quick Start Guide
Impulsify POS Kiosk, credit card terminal, Zebra internal scanner
Uninterruptible Power Supply (UPS)
Kiosk back panel key (located on base of the kiosk | Qty: 2)
Handheld barcode scanner (Do not plug into the kiosk; see section “Kiosk Scanner Configuration” below)
Power Cable
Ethernet Cable
Note: Required for Warranty Coverage

Uninterruptible Power Supply (UPS) will arrive disconnected, with yellow tab lying flat against the unit, as shown here.
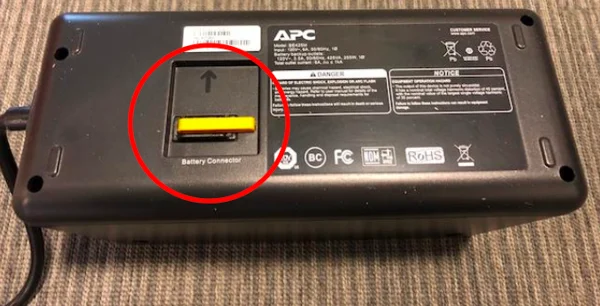
Pull tab towards you and off of unit, then plug into slot to “connect” battery for UPS.
Plug the UPS into the wall outlet
Ensure the UPS is the only device using the outlet.
Plug the kiosk into the UPS using only the Battery + SURGE designated outlets at the top of the UPS to protect from brown-outs
We recommend the kiosk sit on a shelf or cabinet where you are able to conceal the power cords and the UPS itself
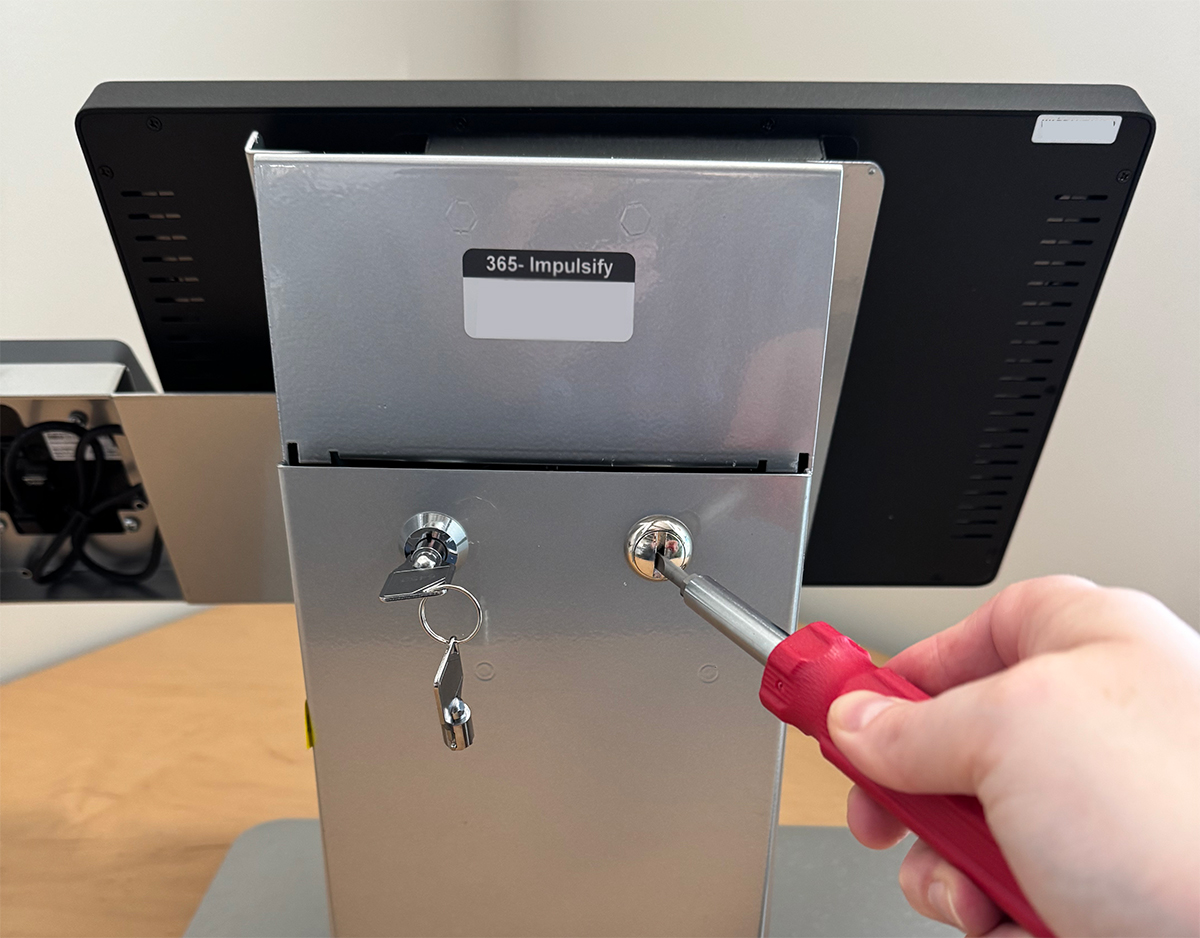
Open the back of the kiosk.
Use the key provided and a flat-head screwdriver to release the two locks on the door.
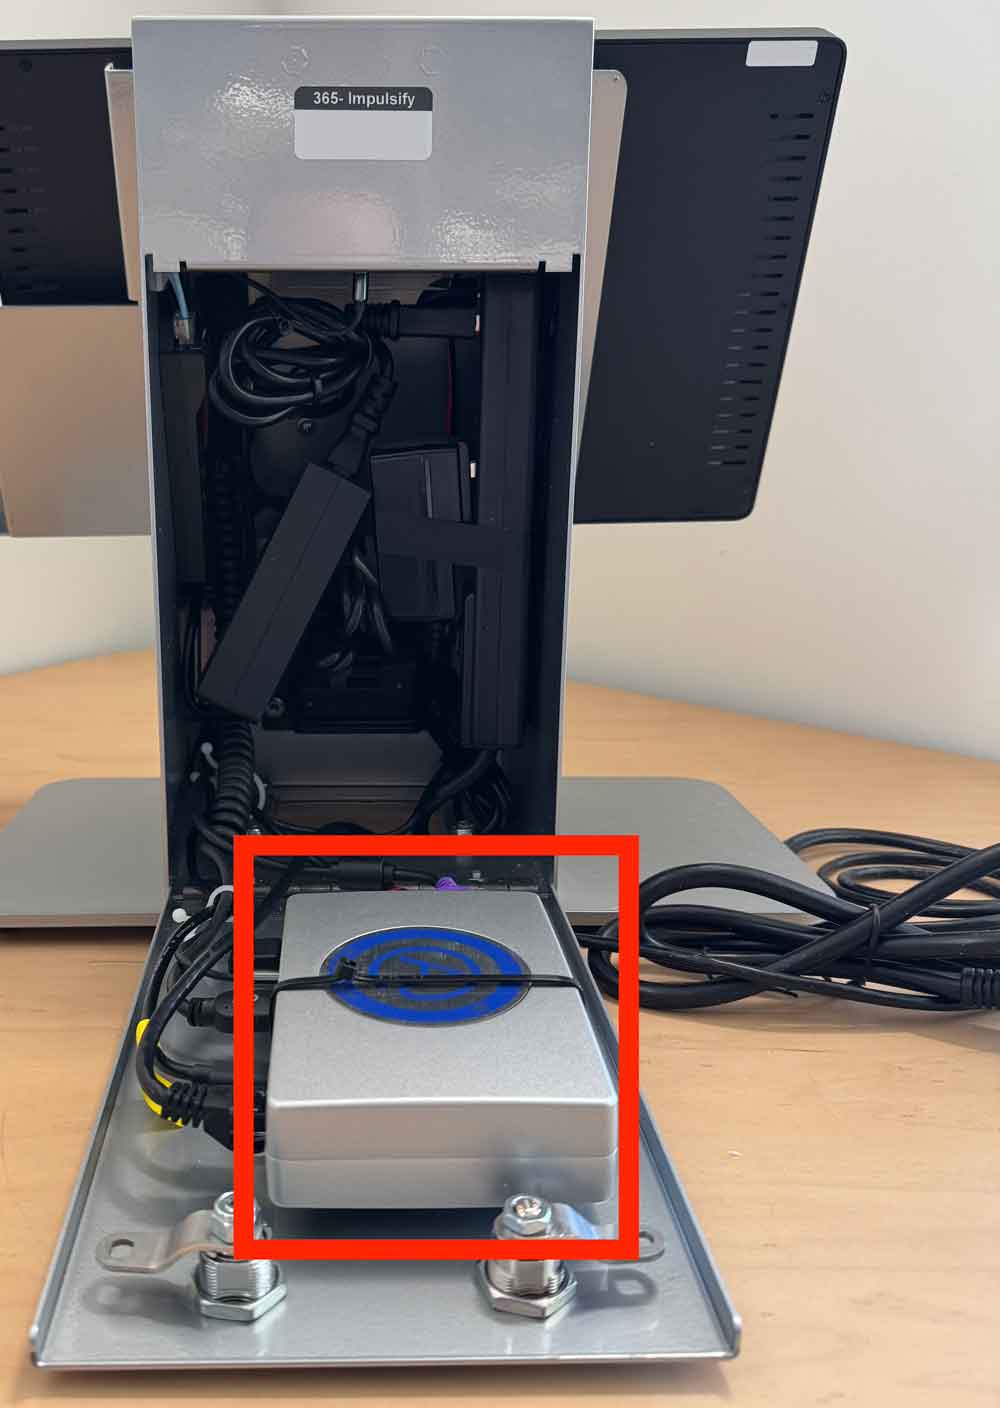
Locate the silver Actineon PC (silver box).
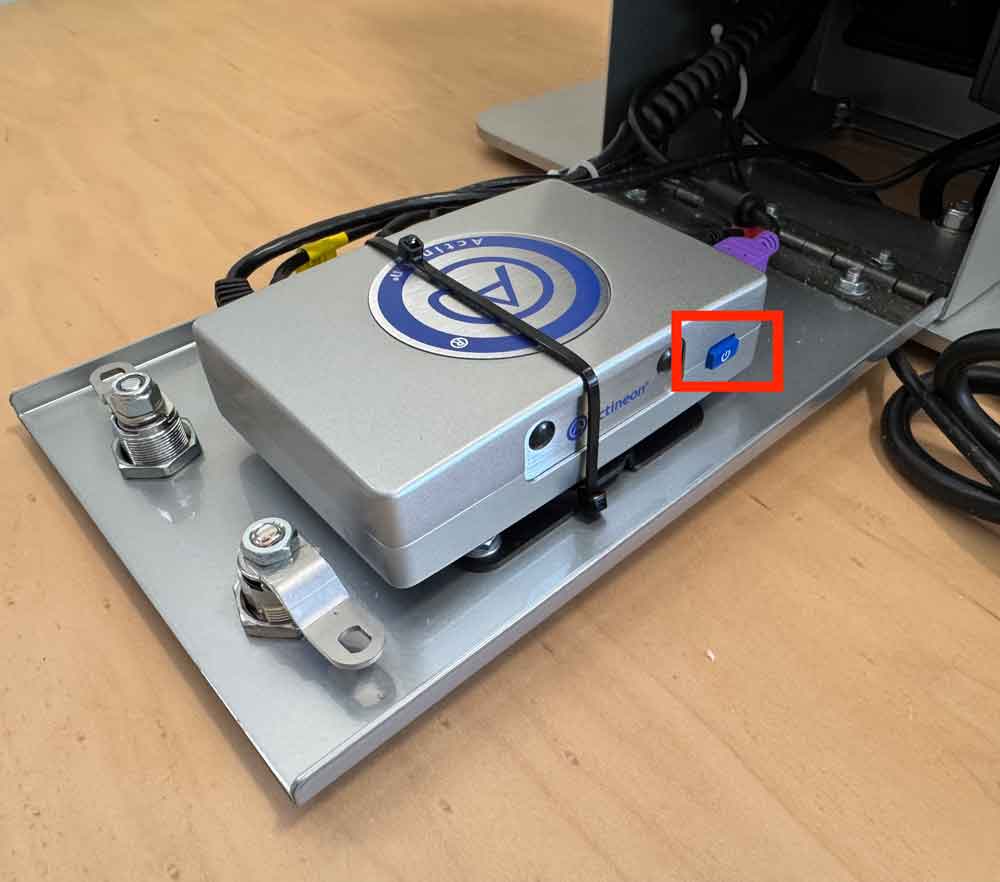
Locate the blue Power Button – Press and hold for 4 seconds to start the kiosk.
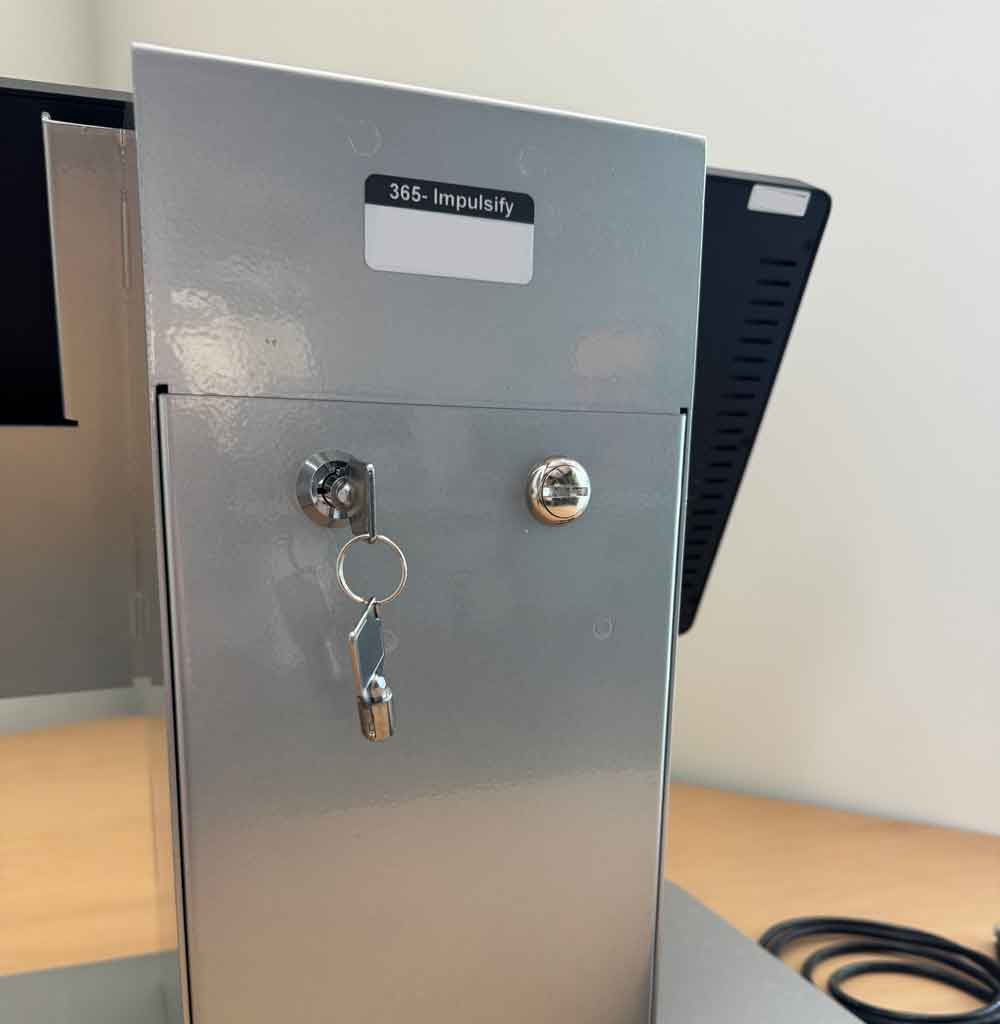
Close the back panel and use the key to lock the unit.
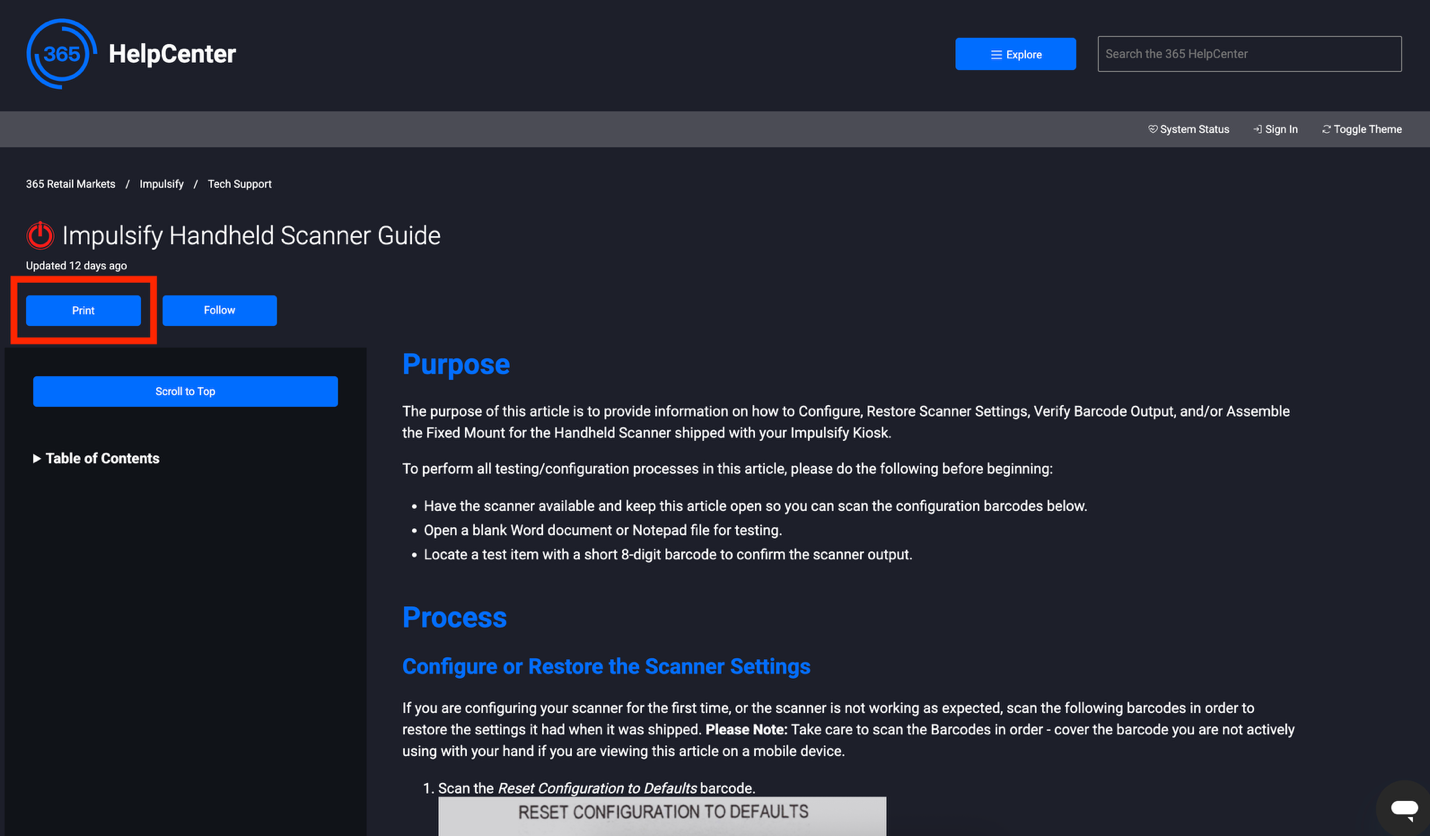
Click the link below to access the 365 HelpCenter: https://help.365retailmarkets.com/hc/en-us/articles/32737283117335-Impulsify-Handheld-Scanner-Guide
Print the article via “print” in the top left corner of the webpage to print out the 3-page PDF.
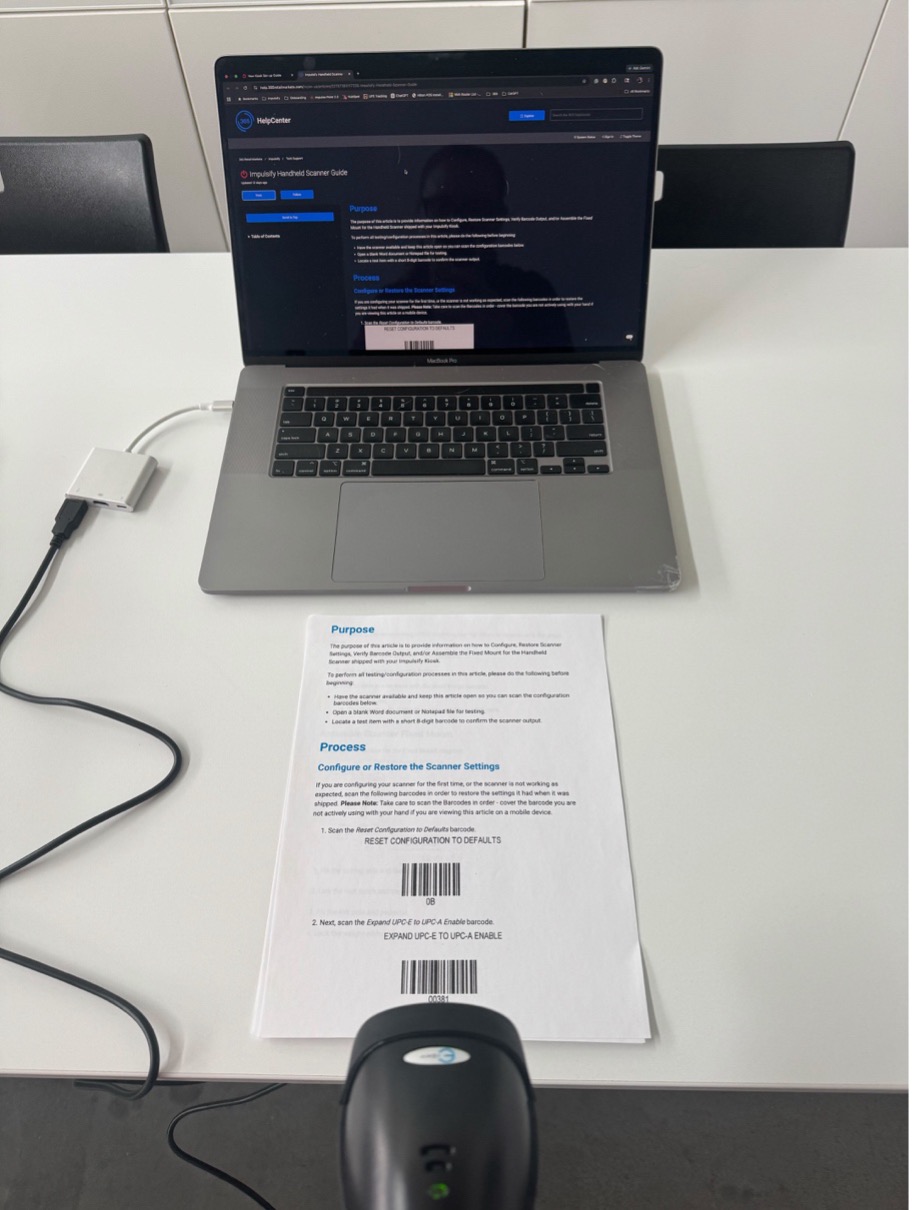
Plug the handheld scanner into a computer, not the Impulsify Kiosk.
Please follow “Process” and “Test the Scanner Output” in the printed PDF guide.
Confirm the test was successful.
The scanner is now ready to add products and inventory within your ImpulsePoint account!
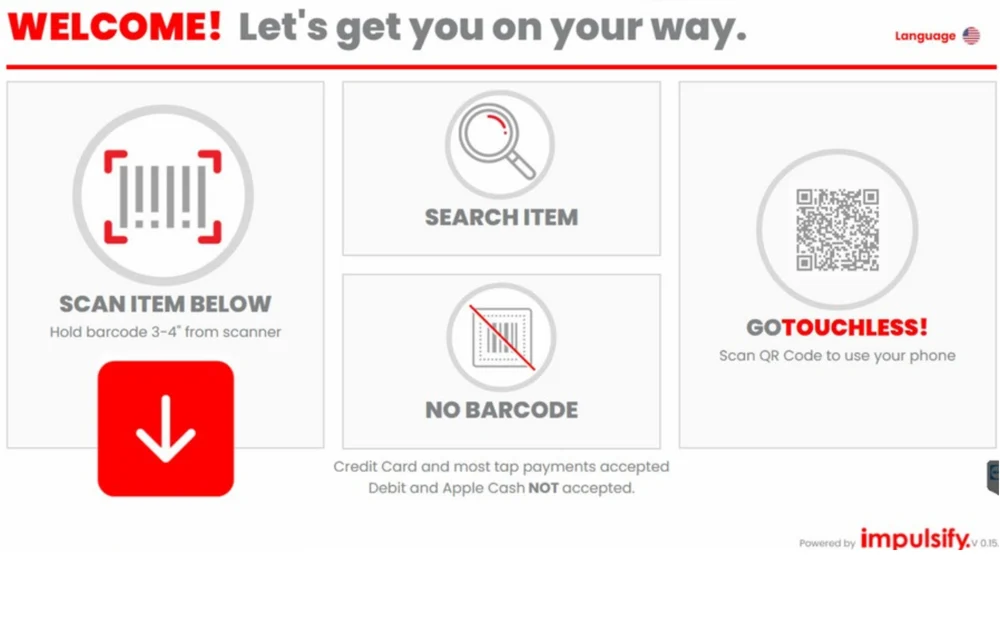
For Unattended Kiosks:
- Once powered on, the kiosk will automatically load tothe ShopPoP home screen.
For Attended Kiosks:
- Once powered on, the kiosk will automatically load tothe Impulsify Login Page.
* If you receive a red screen with an error message of “105” or “106”, please check your network connection.
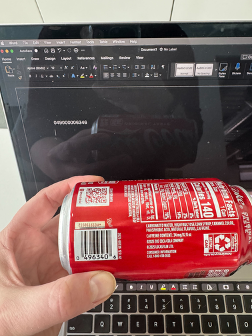
Scan an item in your store.
Sell the item using a Credit Card.
Completed transactions will show receipt options.
For Customer Return Options:
Your Customer Success Manager will reach out to schedule training with you and your team. Prior to training, please contact Support via the “Ongoing Support” section below to request a return.
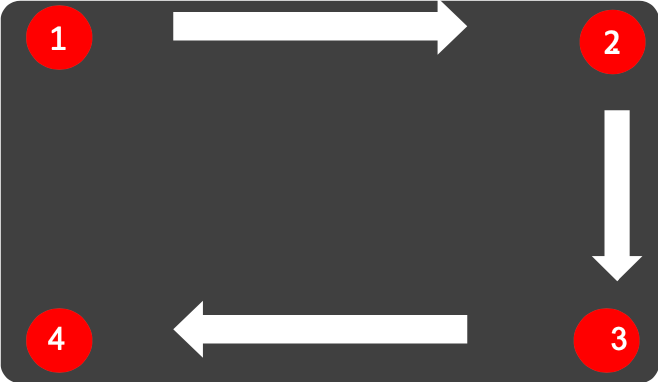
If your Kiosk is not behaving properly or is not responding:
Touch the four corners in a clockwise manner, starting at the top left: Top Left, Top Right, Bottom Right, Bottom Left.
When prompted, enter REBOOT PIN: 9999. Your Kiosk will restart. Please give the Kiosk time to reboot.
Your Kiosk will, on occasion, reboot overnight to perform system updates. Please follow steps above to get Kiosk back online.If problem persists, call 888.306.3252, Option 2**

Open the back of the kiosk.
Use the key provided and a flat-head screwdriver to release the two locks on the door.
Locate the silver Actineon PC (silver box).
Locate the blue Power Button – Press and hold for 4 seconds to power off the kiosk. If a hard reboot is needed, there is a power strip in the kiosk enclosure, and it can be turned off/on.
Close the back panel and use the key to lock the unit.
NOTE: NEVER UNPLUG THE DEVICE WITHOUT PROPERLY POWERING IT DOWN.